Have you ever yearned to recreate fancy napkin folds for your own celebrations? BBJ has created a series of videos with easy-to-follow napkin folding techniques to make it easier to create those chic, elegant napkin folds for every occasion.
Fancy napkin folds can be elegantly simple or just plain fun! Simple napkin folds enhance formal dinners as easily as they add interest to an informal luncheon. And having a repertoire of napkin-folding techniques will set you apart from the crowd! Every event should be special, and there is nothing more basic than accenting your place settings with appropriate napkin folds. Join us as we show you how to master these folds with step-by-step instructional videos.
Here are six ways to express your talents in expressive ways.
How to Do a Fold with Napkin Ring
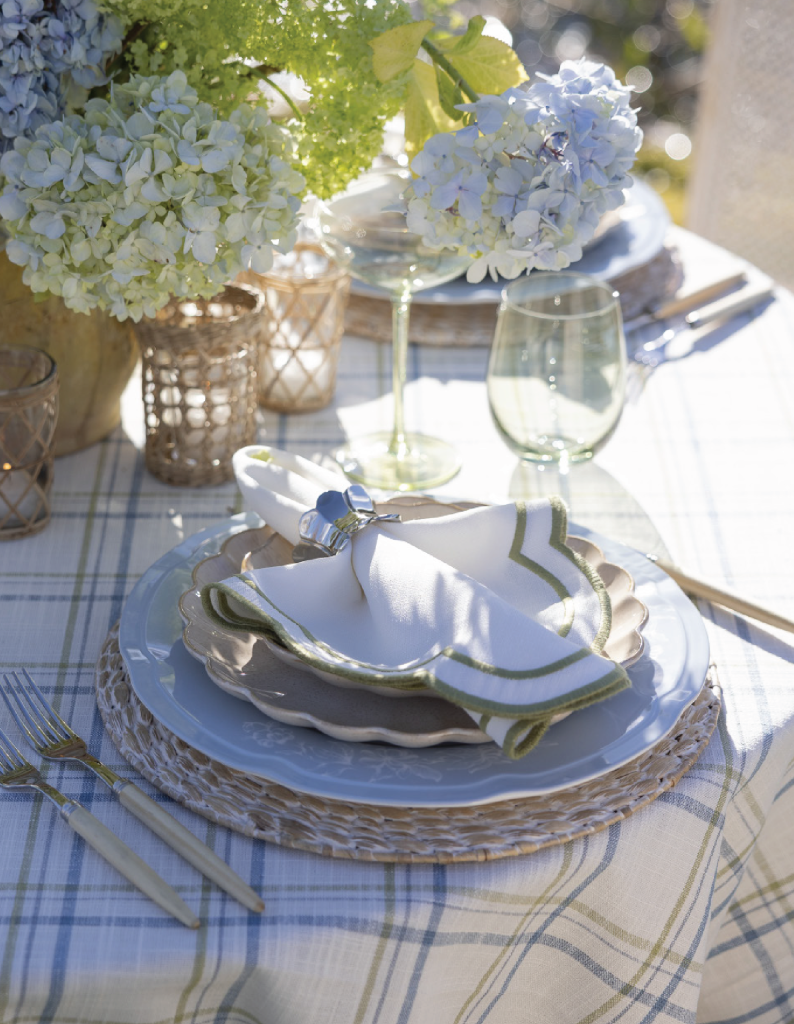
If you’re not yet a fan of napkin rings, you are destined to become one.
Simply choose a ring that complements your theme and keep it nearby as you form a right-side-out triangle with the napkin you are using. Not really even a fold, the Napkin Ring Fold is a perfect solution for an easy event look.
Pinch the center of the fold with one hand and pick it up. Slide your other hand about halfway along the length of the napkin, and then slide the ring in place.
Fluff the napkin to the desired fullness, and place it on the table.
The Classic Napkin Fold
The simple Classic Fold doesn’t take a lot of practice; it’s superbly elegant and a perfect way to begin learning the art of fancy napkin folding.
Start with a basic square napkin. Place it face down on a flat surface, and fold it in half, top side down. Then simply fold it in half again, lining up the hems all around. You will now have a smaller square, with the right side out.
The final step is to once more fold the napkin in half, with the two hemmed edges facing down. Place the napkin on top of the service plate or to the side.
One thing to remember: If you have patterned linen, begin with all napkins facing the same direction so that the end result is a uniform appearance.
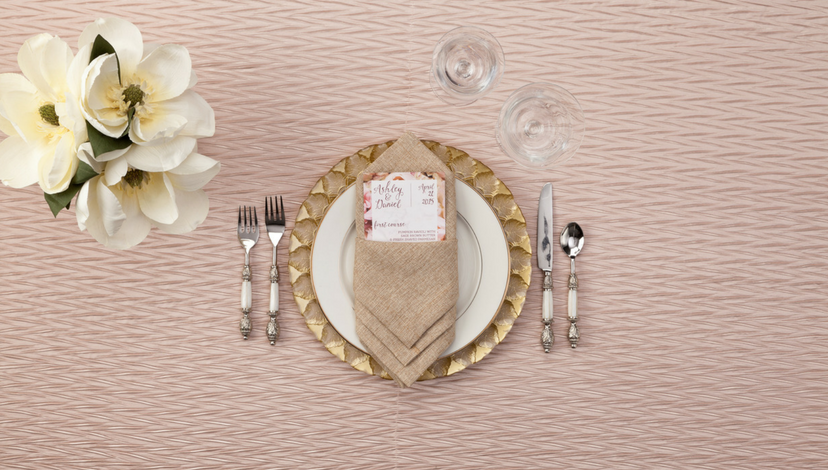
The Menu Card Fold
This technique is another simply elegant way to create a holder for your event’s menu card or to tuck in a flower, a favor or a name card.
Start with the napkin’s “good side” facing down on a flat surface. Fold one edge up about one inch; then fold the opposite edge over to cover the folded edge.
Next, fold the length of the napkin up another inch or so. Smooth the napkin slightly so the fold is solidly in place, and then fold the entire napkin in half and in half again.
The result will be a rectangle with a shallow pocket into which you can slip your Menu Card or decoration. The seamed side of the napkin will, of course, be facing down when you place the napkin on the table.
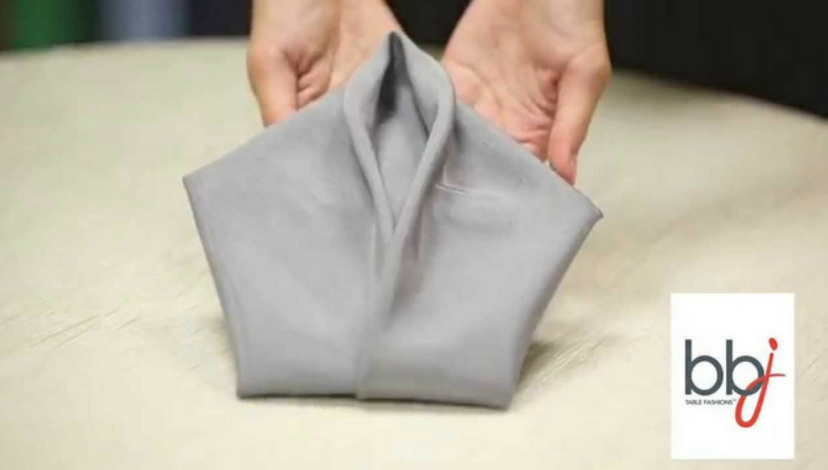
The Napkin Diamond Fold
Another simple procedure, a Diamond Fold is only slightly more difficult, but it adds additional possibilities and several additional layers of interest to the napkin. This is a creative and polished way to integrate a pocket into each napkin.
Start again with a square napkin; place it face up and fold it in half. Then fold it in half again and rotate it so that the open flaps are pointed up and away from you. Rather than a square, at this point, it will look like a diamond.
Fold the top flap down to form a triangle. Continue to fold the next two flaps downward towards the bottom, but offset the folds slightly, approximately the width of the hem, or at a pleasing distance from the flap underneath. Then flip the napkin over so that the folds are facing downward against the table surface.
Fold the right third of the napkin toward the center; repeat on the left side, folding one-third toward the center. Turn the entire napkin over, and slip a menu or name card into the pocket that has been created.
Note: This fold is most appropriate for large, dinner-size napkins.
The Bow Tie Napkin Fold
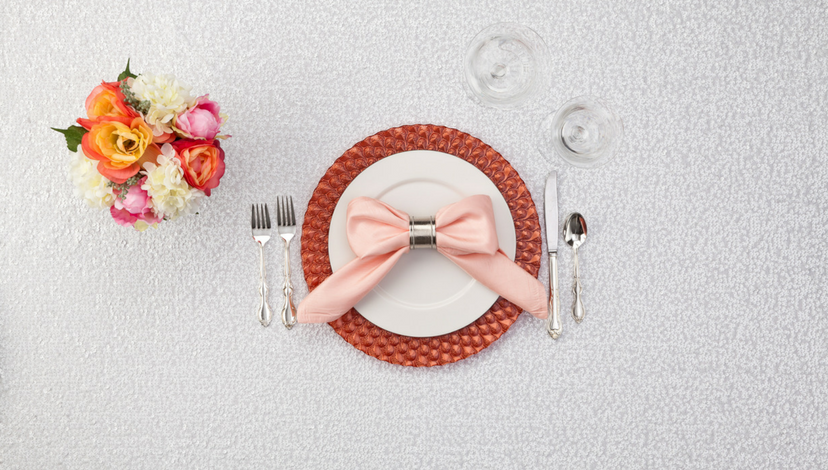
This one’s not hard, but it may require a bit of practice. Start with the napkin’s wrong side facing up on a flat surface; make one fold to form a triangle, with the folded edge facing you.
Fold the top corner down one third; then fold the bottom edge up one fourth two times to cover the top tip. Fold the top down to cover the bottom. Now you’ll have a long tube.
Fold the right tip up at a 45-degree angle; then do the same with the other tip. Pinch the center of the napkin together as you also pull the ends toward the center.
Slide the napkin tube through a ring, and pull the tails downward to form a soft sweet bow.
The Tuxedo Napkin Fold
Slightly complicated to master, but so worth it for the effect, begin the Tux Fold with the patterned side of the linen napkin facing down on a flat surface.
Starting at one corner, form a triangle, but don’t align the edges exactly, leaving the top triangle slightly smaller than the bottom. Then fold two more triangles to create a square. Flip the entire square over and turn it so that it appears to you as a diamond shape.
Next, fold each side of the diamond so that they meet to form a kite shape. Hold it in place and then turn the narrow bottom edge of the kite up towards the wider top edge, bringing the point slightly above the folded edge. Next, holding it securely, flip the entire napkin over once more.
Finally, separate the “tux” edges slightly and enjoy your handiwork!
These six napkin folds are sure to enhance any special event. We’re sure you’ll enjoy using them. BBJ also has additional napkin folding techniques and other suggestions to showcase your talents, in addition to our vast array of linen and special event options.